
How to create a bootable USB from an ISO Image
Using Windows
For Windows users, the preferred tool to create a bootable USB device from an ISO Image is Rufus. Rufus has the advantage of not needing to be “installed”: a user can run it directly from the downloaded “.exe file”.
To use Rufus, first insert a 4GB (or greater) USB drive (WARNING! using the Rufus default settings, this USB drive WILL BE COMPLETELY REFORMATTED, so all data WILL BE LOST!).
Then, start Rufus. It should auto-detect the USB device and look similar to this:
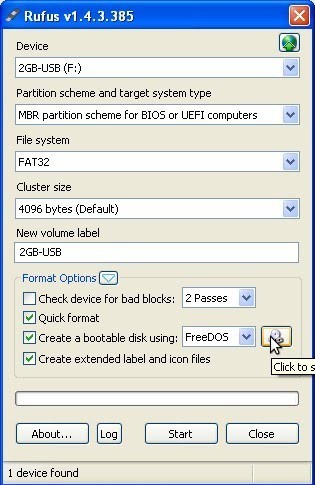
Keep all the default settings, and click the CD icon (seen in the above screen shot) and navigate to the Wasta-Linux ISO you downloaded. After you select the Wasta-Linux ISO, Rufus should look like this:
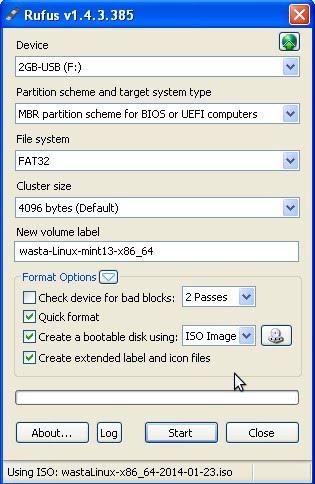
Click “Start”, and, after completing, your bootable Wasta-Linux USB stick should be ready!
After booting the machine you want to install Wasta-Linux on from the created USB device, if the installer has been set up correctly you should see the following boot menu:

Please use the first boot option “live - boot the Live System” even if you are ready to install. Once the Live System is booted, you can click the icon on the desktop to begin the Wasta-Linux installation.
Using Linux
For Linux users, in order to make a UEFI and “Legacy” compatible “read only” USB installer drive use the “Startup Disk Creator” from Ubuntu or Wasta-Linux. Alternatively a simple terminal utility named “mkusb-nox”, which is pre-installed in Wasta-Linux 16.04+, works well.